11 KiB
Burp 証明書のインストール
{{#include ../../banners/hacktricks-training.md}}
ADB 経由のシステム全体プロキシ
すべてのアプリがあなたのインターセプター(Burp/mitmproxy)を経由してトラフィックをルーティングするように、グローバルな HTTP プロキシを設定します:
# Set proxy (device/emulator must reach your host IP)
adb shell settings put global http_proxy 192.168.1.2:8080

# Clear proxy
adb shell settings put global http_proxy :0
Tip: In Burp, bind your listener to 0.0.0.0 so devices on the LAN can connect (Proxy -> Options -> Proxy Listeners).
On a Virtual Machine
まず最初に、BurpからDer証明書をダウンロードする必要があります。これは Proxy --> Options --> Import / Export CA certificate で行えます。
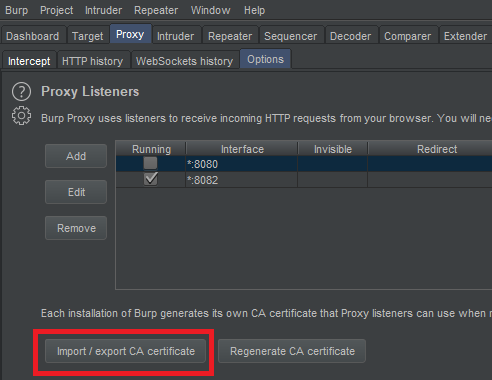
Export the certificate in Der format and lets transform it to a form that Android is going to be able to understand. Note that in order to configure the burp certificate on the Android machine in AVD you need to run this machine with the -writable-system option.
例えば、次のように実行できます:
C:\Users\<UserName>\AppData\Local\Android\Sdk\tools\emulator.exe -avd "AVD9" -http-proxy 192.168.1.12:8080 -writable-system
次に、burps certificate を設定するには:
openssl x509 -inform DER -in burp_cacert.der -out burp_cacert.pem
CERTHASHNAME="`openssl x509 -inform PEM -subject_hash_old -in burp_cacert.pem | head -1`.0"
mv burp_cacert.pem $CERTHASHNAME #Correct name
adb root && sleep 2 && adb remount #Allow to write on /syste
adb push $CERTHASHNAME /sdcard/ #Upload certificate
adb shell mv /sdcard/$CERTHASHNAME /system/etc/security/cacerts/ #Move to correct location
adb shell chmod 644 /system/etc/security/cacerts/$CERTHASHNAME #Assign privileges
adb reboot #Now, reboot the machine
マシンが再起動を完了すると burp 証明書が使用されるようになります!
Magisc の使用
もし Magiscでデバイスをroot化した(おそらくエミュレータ)、そして前の 手順 に従えず、Burp 証明書をインストールできない(ファイルシステムが読み取り専用で書き込み可能にリマウントできない)場合、別の方法があります。
説明は this video にあります。必要な手順は次のとおりです:
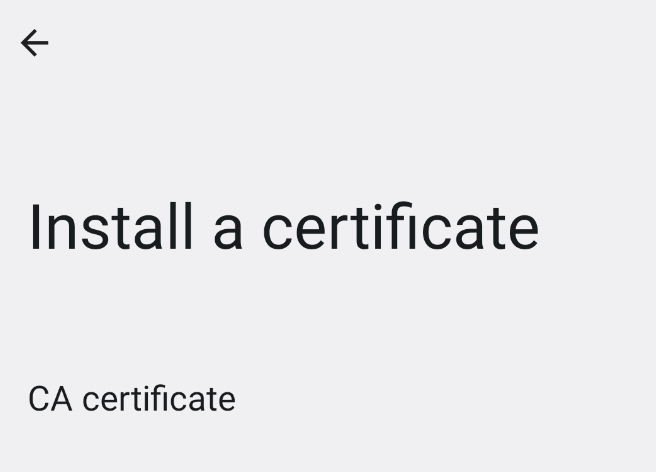
- Install a CA certificate: モバイルに DER 形式の Burp 証明書を changing the extension して拡張子を
.crtにし、Downloads フォルダに drag&drop で保存してからInstall a certificate->CA certificateに進みます。
- 証明書が正しく保存されているかは
Trusted credentials->USERで確認してください

- Make it System trusted: Magisc モジュール MagiskTrustUserCerts(.zip ファイル)をダウンロードし、電話に drag&drop it します。電話上の Magics app を開き
Modulesセクションに移動、Install from storageをクリックして.zipモジュールを選択し、インストールが完了したら端末を reboot してください:

- 再起動後、
Trusted credentials->SYSTEMに行き、Postswigger 証明書が存在することを確認します

Magisc モジュールの作成方法を学ぶ
Android 14以降
最新の Android 14 リリースでは、system-trusted Certificate Authority (CA) 証明書の扱いに大きな変化が見られます。従来、これらの証明書は /system/etc/security/cacerts/ に保存され、root 権限を持つユーザーがアクセス・変更できたため、システム全体に即時に反映されていました。しかし Android 14 では格納場所が /apex/com.android.conscrypt/cacerts(/apex パス内のディレクトリ)に移動しており、/apex は本質的に不変です。
APEX cacerts path を書き込み可能にリマウントしようとしても失敗します。システムはそのような操作を許可しません。ディレクトリをアンマウントしたり、一時的なファイルシステム (tmpfs) でオーバーレイしようとしても不変性を回避できず、アプリケーションはファイルシステムレベルの変更に関わらず元の証明書データにアクセスし続けます。これは /apex のマウントが PRIVATE プロパゲーションで設定されているためで、/apex 内の変更が他のプロセスに影響を与えないようになっています。
Android の初期化では init プロセスが OS 起動時に Zygote プロセスを起動します。Zygote は新しいマウントネームスペースを持つアプリケーションプロセスを起動する役割を担っており、そのネームスペースにはプライベートな /apex マウントが含まれるため、このディレクトリへの変更は他のプロセスから隔離されます。
それでも、/apex ディレクトリ内の system-trusted CA 証明書を変更する必要がある場合の回避策は存在します。これは /apex の PRIVATE プロパゲーションを解除して書き込み可能にするために手動で再マウントする方法です。手順は、/apex/com.android.conscrypt の内容を別の場所にコピーし、読み取り専用の制約を取り除くために /apex/com.android.conscrypt をアンマウントし、その後内容を元の /apex 内に復元する、というものです。この操作はシステムクラッシュを避けるために素早く行う必要があります。変更をシステム全体に確実に反映させるには、すべてのアプリケーションを再起動してシステムを整合状態に戻す system_server の再起動が推奨されます。
# Create a separate temp directory, to hold the current certificates
# Otherwise, when we add the mount we can't read the current certs anymore.
mkdir -p -m 700 /data/local/tmp/tmp-ca-copy

# Copy out the existing certificates
cp /apex/com.android.conscrypt/cacerts/* /data/local/tmp/tmp-ca-copy/

# Create the in-memory mount on top of the system certs folder
mount -t tmpfs tmpfs /system/etc/security/cacerts

# Copy the existing certs back into the tmpfs, so we keep trusting them
mv /data/local/tmp/tmp-ca-copy/* /system/etc/security/cacerts/

# Copy our new cert in, so we trust that too
mv $CERTIFICATE_PATH /system/etc/security/cacerts/

# Update the perms & selinux context labels
chown root:root /system/etc/security/cacerts/*
chmod 644 /system/etc/security/cacerts/*
chcon u:object_r:system_file:s0 /system/etc/security/cacerts/*

# Deal with the APEX overrides, which need injecting into each namespace:

# First we get the Zygote process(es), which launch each app
ZYGOTE_PID=$(pidof zygote || true)
ZYGOTE64_PID=$(pidof zygote64 || true)
# N.b. some devices appear to have both!

# Apps inherit the Zygote's mounts at startup, so we inject here to ensure
# all newly started apps will see these certs straight away:
for Z_PID in "$ZYGOTE_PID" "$ZYGOTE64_PID"; do
if [ -n "$Z_PID" ]; then
nsenter --mount=/proc/$Z_PID/ns/mnt -- \
/bin/mount --bind /system/etc/security/cacerts /apex/com.android.conscrypt/cacerts
fi
done

# Then we inject the mount into all already running apps, so they
# too see these CA certs immediately:

# Get the PID of every process whose parent is one of the Zygotes:
APP_PIDS=$(
echo "$ZYGOTE_PID $ZYGOTE64_PID" | \
xargs -n1 ps -o 'PID' -P | \
grep -v PID
)

# Inject into the mount namespace of each of those apps:
for PID in $APP_PIDS; do
nsenter --mount=/proc/$PID/ns/mnt -- \
/bin/mount --bind /system/etc/security/cacerts /apex/com.android.conscrypt/cacerts &
done
wait # Launched in parallel - wait for completion here

echo "System certificate injected"
Bind-mounting through NSEnter
- 書き込み可能なディレクトリの設定: 最初に、既存の非-APEXシステム証明書ディレクトリの上に
tmpfsをマウントして書き込み可能なディレクトリを作成します。これは次のコマンドで実行されます:
mount -t tmpfs tmpfs /system/etc/security/cacerts
- Preparing CA Certificates: 書き込み可能なディレクトリをセットアップした後、使用する CA 証明書をこのディレクトリにコピーします。これには、デフォルトの証明書を
/apex/com.android.conscrypt/cacerts/からコピーすることが含まれる場合があります。これらの証明書のパーミッションと SELinux ラベルを適切に調整することが重要です。 - Bind Mounting for Zygote:
nsenterを利用して Zygote のマウント名前空間に入ります。Zygote は Android アプリケーションの起動を担当するプロセスであり、この手順によりこれ以降に起動されるすべてのアプリケーションが新しく設定した CA 証明書を利用するようになります。使用するコマンドは:
nsenter --mount=/proc/$ZYGOTE_PID/ns/mnt -- /bin/mount --bind /system/etc/security/cacerts /apex/com.android.conscrypt/cacerts
これにより、起動するすべての新しいアプリが更新された CA 証明書の設定に従うようになります。
- 実行中のアプリに変更を適用する: 既に実行中のアプリに変更を適用するには、
nsenterを再度使用して各アプリの namespace に個別に入り、同様の bind mount を実行します。必要なコマンドは:
nsenter --mount=/proc/$APP_PID/ns/mnt -- /bin/mount --bind /system/etc/security/cacerts /apex/com.android.conscrypt/cacerts
- 代替アプローチ - Soft Reboot: 別の方法として、
initプロセス(PID 1)でbind mountを実行し、続いてstop && startコマンドでオペレーティングシステムをソフトリブートする手法があります。このアプローチは変更をすべてのnamespacesに伝播させ、個々の実行中のappに対処する必要を回避します。ただし、再起動の手間があるため、一般的にはあまり好まれません。
References
- Android 14: Install a system CA certificate on a rooted device
- Build a Repeatable Android Bug Bounty Lab: Emulator vs Magisk, Burp, Frida, and Medusa
{{#include ../../banners/hacktricks-training.md}}